So, you’ve just unwrapped a brand-new Mac this Christmas. Congratulations! Whether it’s your first Mac or you’re switching from a Windows PC, this guide will walk you through everything you need to know to set up your Mac and get the most out of it.
Apple is known for crafting devices that are intuitive and easy to use, but some features and settings might not be immediately obvious if you’re new to macOS. By the end of this guide, you’ll be fully prepared to make the most of your new machine as we head into 2025. Let’s dive in and make sure you’re ready for the new year with your shiny new Mac!
Initial Setup
Check the Box
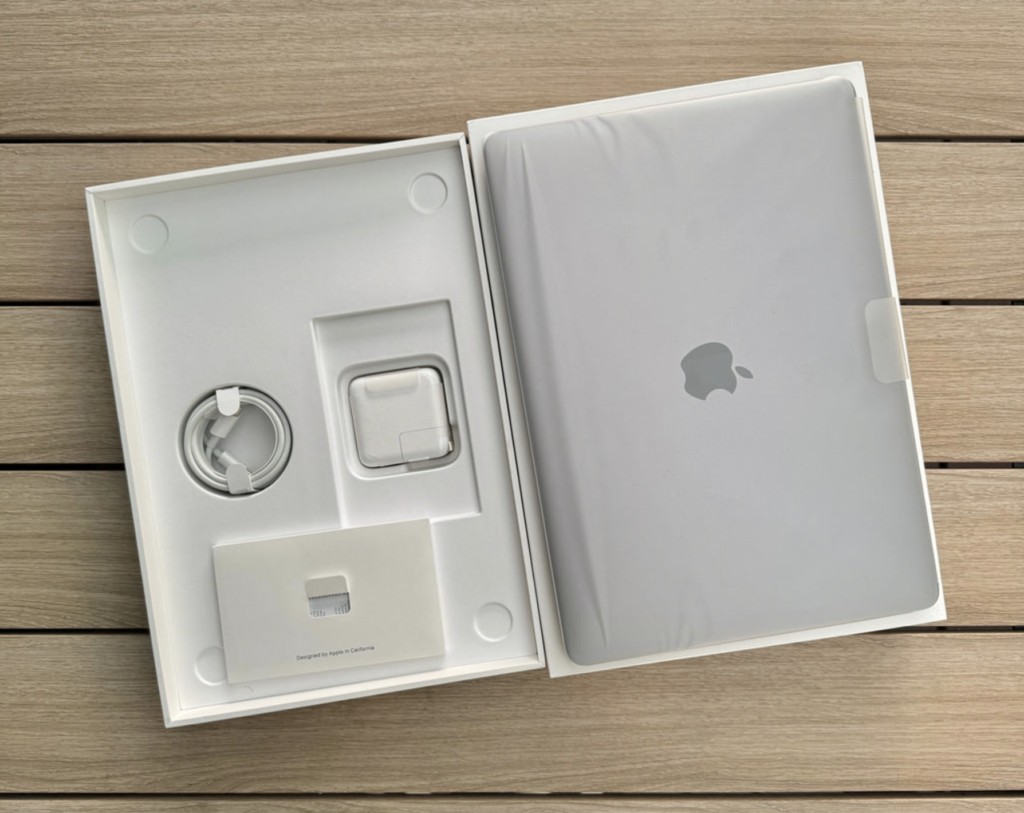
When you open the box, make sure you have everything you need to get started. The last thing you want is to realize something’s missing when you’re excited to dive in. Here’s a quick checklist:
- The MacBook or iMac itself, carefully packaged
- A power adapter (MagSafe for MacBook or standard adapter for iMac)
- USB-C cable for charging or connecting accessories
- Documentation (including stickers, of course!)
Before tossing the box, double-check under flaps and compartments. Apple often hides cables or smaller accessories in subtle packaging slots. If anything is missing, contact Apple Support immediately.
Power It On
Open the MacBook lid or press the power button on the iMac. Most new Macs turn on automatically when the lid is lifted or the device is plugged in. If your Mac doesn’t power up, hold the power button for a few seconds to trigger startup.
Language and Region
Select your preferred language, country, and keyboard layout. This may seem basic, but getting this right will save you from dealing with incorrect date formats or unusual keyboard configurations.
Wi-Fi Connection
Choose your Wi-Fi network and enter the password. If you’re near your router and want faster speeds, consider plugging in an Ethernet cable using a USB-C adapter. This will make downloads and software updates quicker during the initial setup.
Apple ID / Apple Account
Signing in with your Apple ID (recently renamed to Apple Account) connects your Mac to iCloud, the App Store, and Apple services. This also syncs your data, messages, and photos across devices. If you skip this step, you can always sign in later through System Settings > Apple Account.
Migration Assistant (Optional)
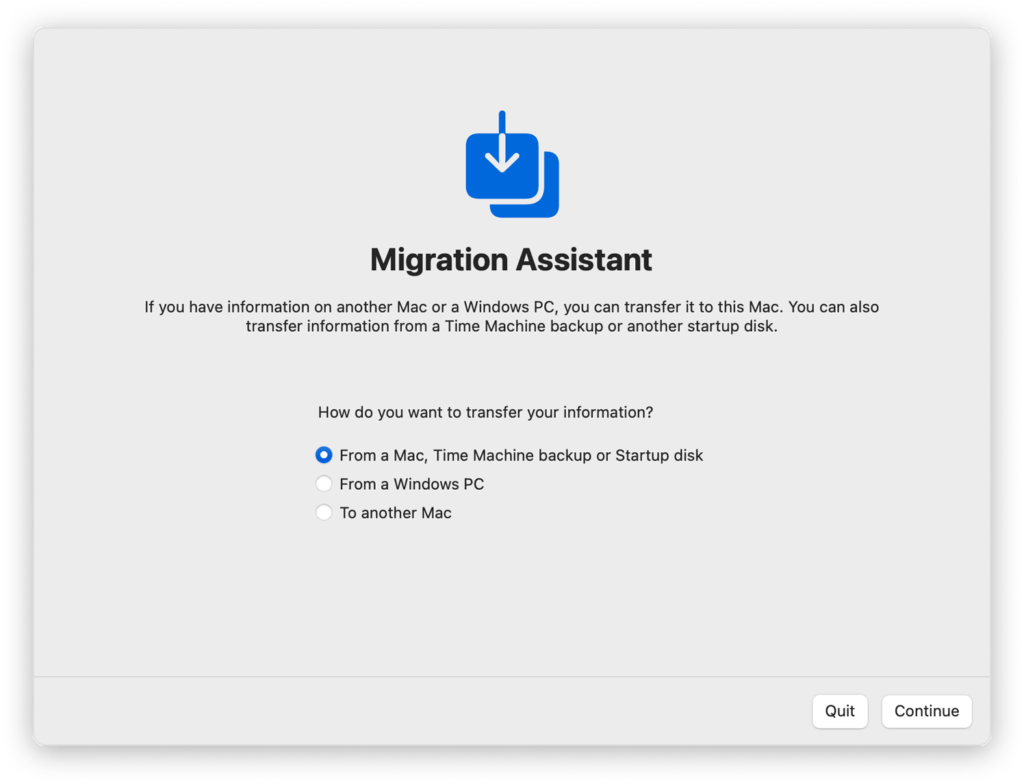
Migration Assistant makes transitioning from another Mac or PC incredibly easy. It transfers files, apps, and settings. If your old device feels cluttered, consider starting fresh and manually transferring essential files later.
To access Migration Assistant, navigate to Applications > Utilities > Migration Assistant and follow the on-screen prompts.
Key Settings to Configure
Trackpad and Mouse
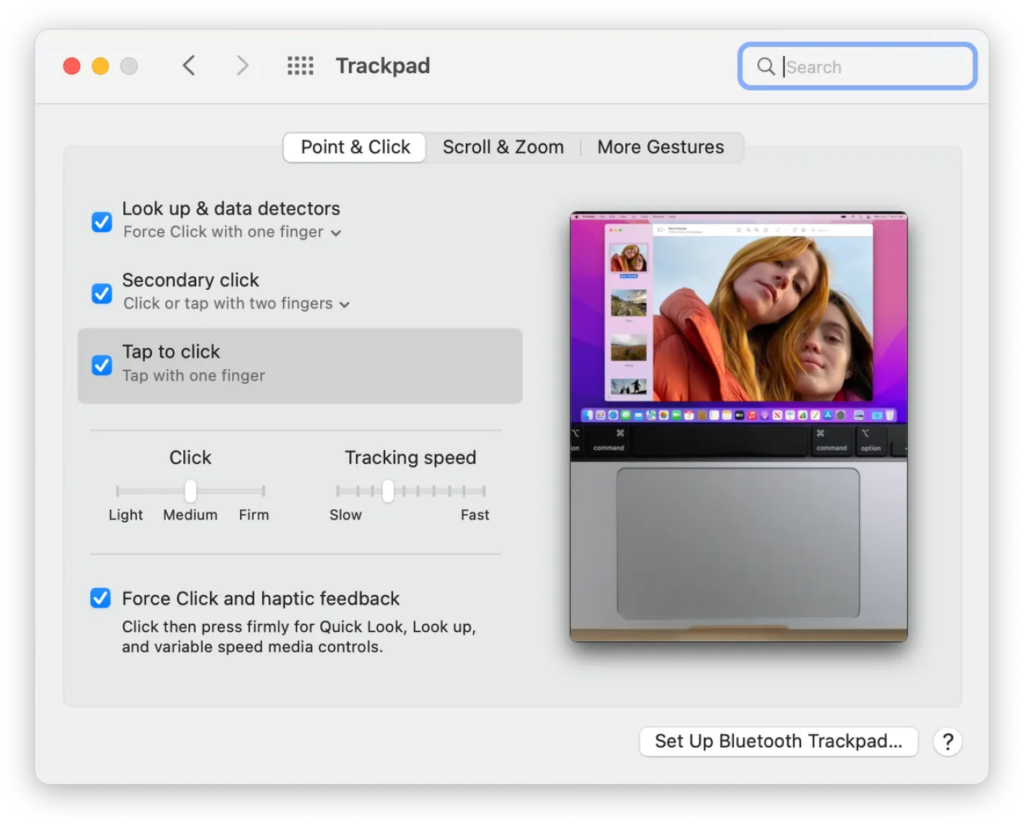
MacBooks have highly responsive trackpads, but enabling Tap to Click will save you from having to press down hard. Go to System Settings > Trackpad and enable ‘Tap to Click.’ This makes light taps function as clicks.
Additionally, Natural Scrolling may feel backward if you’re used to Windows. Disable it under Trackpad > Scroll & Zoom to make scrolling more intuitive.
FileVault Encryption
Your Mac holds valuable data. Enable FileVault under Privacy & Security to encrypt your entire disk. This ensures your data stays protected even if your Mac is lost or stolen.
Touch ID
Touch ID adds a layer of convenience and security. Set up Touch ID to unlock your Mac or approve purchases with a quick fingerprint scan. Find this option in System Settings > Touch ID & Password.
Siri and Dictation
Siri can perform quick searches, set reminders, or open apps hands-free. Activate Siri during setup or later by going to System Settings > Siri & Spotlight.
Navigating macOS
The Menu Bar
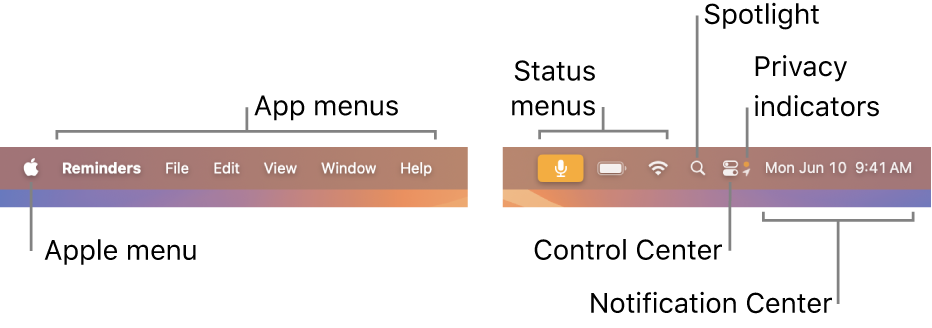
The Menu Bar sits at the top of your screen and changes based on the app you’re using. For example, Safari displays options like “File” and “View,” while Mail shows its own set of controls. This dynamic setup keeps your workspace uncluttered.
The Apple logo on the far left is always present. Click it for system-wide controls like Shut Down, Restart, Sleep, and Force Quit.
On the far right are system status icons (battery, Wi-Fi, Bluetooth, etc.). Click them to adjust settings quickly.
The Dock
The Dock, usually at the bottom of your screen, gives quick access to apps, folders, and minimized windows. Pinned apps are on the left; open apps and the Trash are on the right.
To customize, drag apps or folders from Launchpad or Finder into the Dock. Remove apps by dragging them out or right-clicking and selecting Options > Remove from Dock.
Adjust size and position by going to System Settings > Desktop & Dock. You can hide the Dock when not in use or move it to the left or right of the screen.

Finder
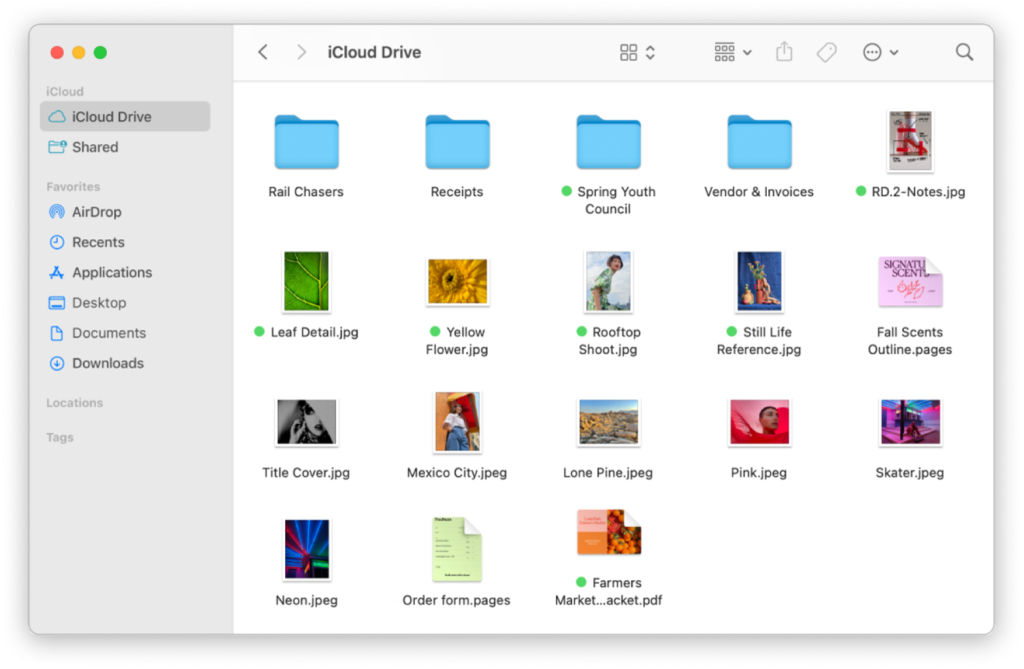
Finder is your file manager in macOS. Access it via the smiling face icon in the Dock. It organizes files and folders in a clean layout, similar to Windows’ File Explorer.
Column View (View > As Columns) offers easy folder navigation. Open new Finder tabs with Command + T to keep your workspace tidy.
To personalize the Sidebar, drag frequently-used folders under Favorites. Right-click to remove them. Finder integrates with iCloud Drive for seamless file access across Apple devices.
Use Finder Tags to color-code and label important files. You can create custom tags for different categories, such as “Urgent,” “Work,” or “Personal.” This makes it easier to quickly find and organize files without wasting time searching through directories.
Apps & Tools
Your Mac comes pre-installed with a suite of powerful apps designed to boost productivity right out of the box. Here are some of the built-in tools you can start using immediately:
- Spotlight: Open Spotlight by pressing Command + Space to search for files, apps, or even conduct web searches.
- Mission Control: Swipe up with three fingers or press F3 to see all open apps and quickly switch between tasks without closing windows.
- Split View and Window Management: Tile two apps side by side by hovering over the green window button and selecting “Tile Window to Left/Right.” For more advanced window management, you can install third-party apps like Magnet or Rectangle.
For additional apps that suit your specific needs, head over to the App Store. Simply open Launchpad or click the App Store icon, search for the apps you need, and click ‘Get’ or ‘Buy.’ You’ll be prompted to enter your Apple ID password to complete the download.
If you’re looking for apps not available in the App Store, many popular options can be downloaded directly from the developer’s website. For instance, you can download Google Chrome directly from Google’s website and then drag it to your Applications folder to install. Similarly, Fello AI, a powerful desktop AI tool, can be downloaded directly from its official site and installed following the provided instructions.
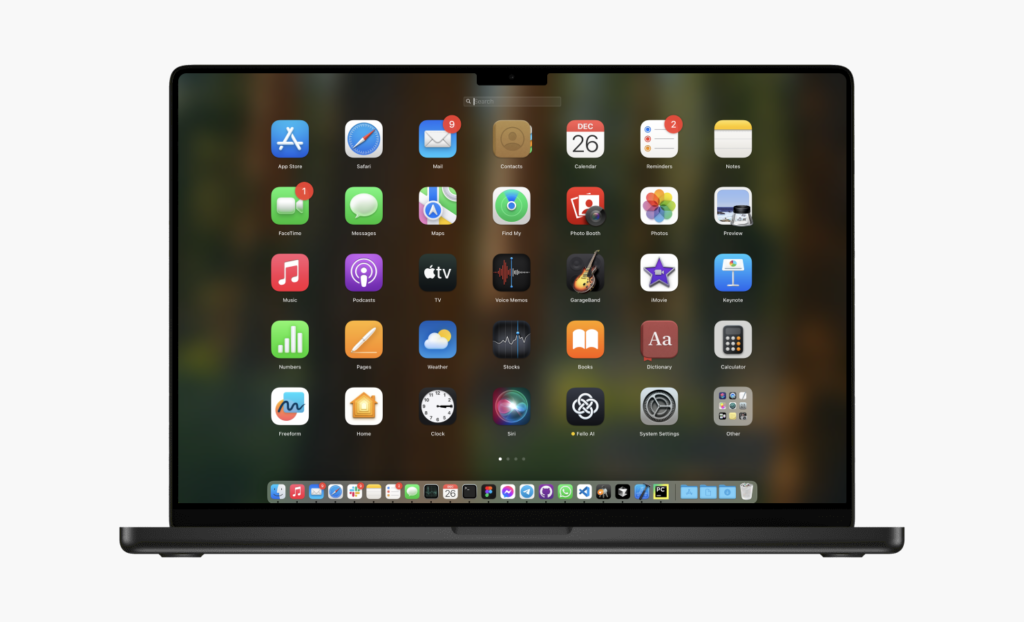
Other apps, like Slack or Spotify, are also available for download from their respective websites, allowing you to easily install the latest version for seamless functionality on your Mac.
💡 Pro Tip: Check out our guide on Top Apps to Install on Your New Mac to explore must-have apps that enhance productivity, entertainment, and system management.
Productivity Tips
Multiple Desktops
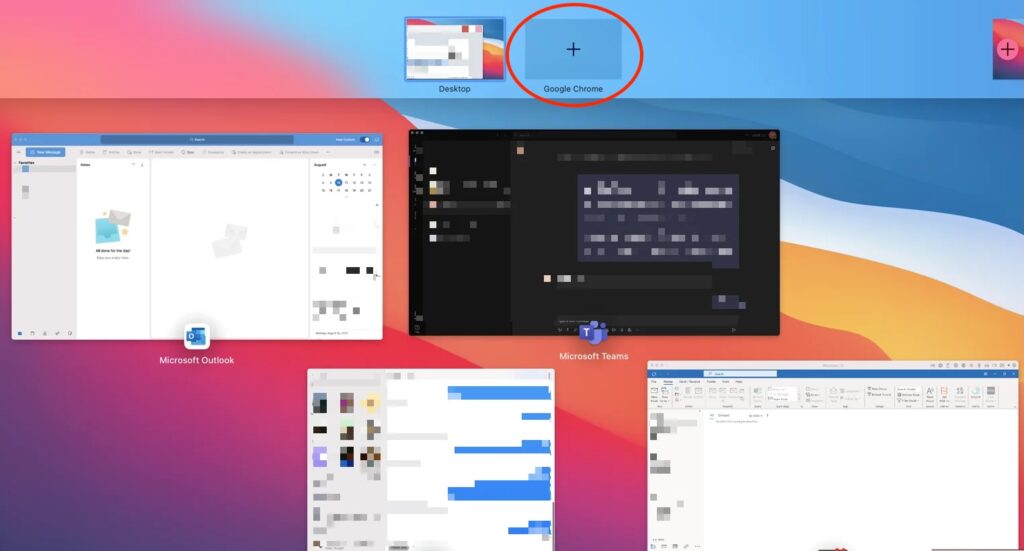
Stay organized by separating your work and personal tasks using multiple desktops. This allows you to keep different projects and apps neatly divided. To create a new desktop, swipe up with three fingers on your trackpad and click the +button in the top right. You can easily switch between desktops by swiping left or right with three fingers, helping you focus on one thing at a time.
Quick Screenshots
Take quick screenshots to capture your screen or specific sections for easier note-taking or reference:
- Entire Screen: Press Command + Shift + 3 to capture the entire screen.
- Selected Portion: Press Command + Shift + 4 to select a specific area to screenshot.
- Screen Recording: Press Command + Shift + 5 to record your screen. This option allows you to choose whether to record the whole screen, a selected portion, or capture a screenshot, streamlining your workflow for quick visual documentation.
iCloud and Backups
Enable iCloud Drive to keep your files synced across all your devices automatically. This ensures you can access important documents from your Mac, iPhone, or iPad without worrying about version control. Additionally, set up Time Machine with an external drive for regular backups, which ensures your data is safely stored and can be restored if anything goes wrong.
Use Spotlight for Fast File Searches
Take full advantage of Spotlight to quickly search for files, apps, emails, or even perform web searches without opening a browser. Press Command + Space to open Spotlight, type what you’re looking for, and hit Enter to open it immediately. This can save you time and streamline your workflow by reducing the need to manually browse through folders.
Apple Intelligence
Apple Intelligence on macOS Sequoia brings AI-powered features to apps like Mail, Notes, and Pages, allowing you to quickly summarize, rewrite, and proofread text. Siri is smarter, offering context-aware help, while tools like Image Playground and Genmoji add creative options for image and emoji creation.
Designed with privacy in mind, Apple Intelligence processes many tasks directly on your Mac, ensuring your data stays secure. For more intensive tasks, Apple uses Private Cloud Compute. Make sure your Mac has Apple Silicon (M1 or later) to access these features, or try apps like Fello AI for similar AI capabilities. Read more about Apple Intelligencehere.
Customization
Wallpaper
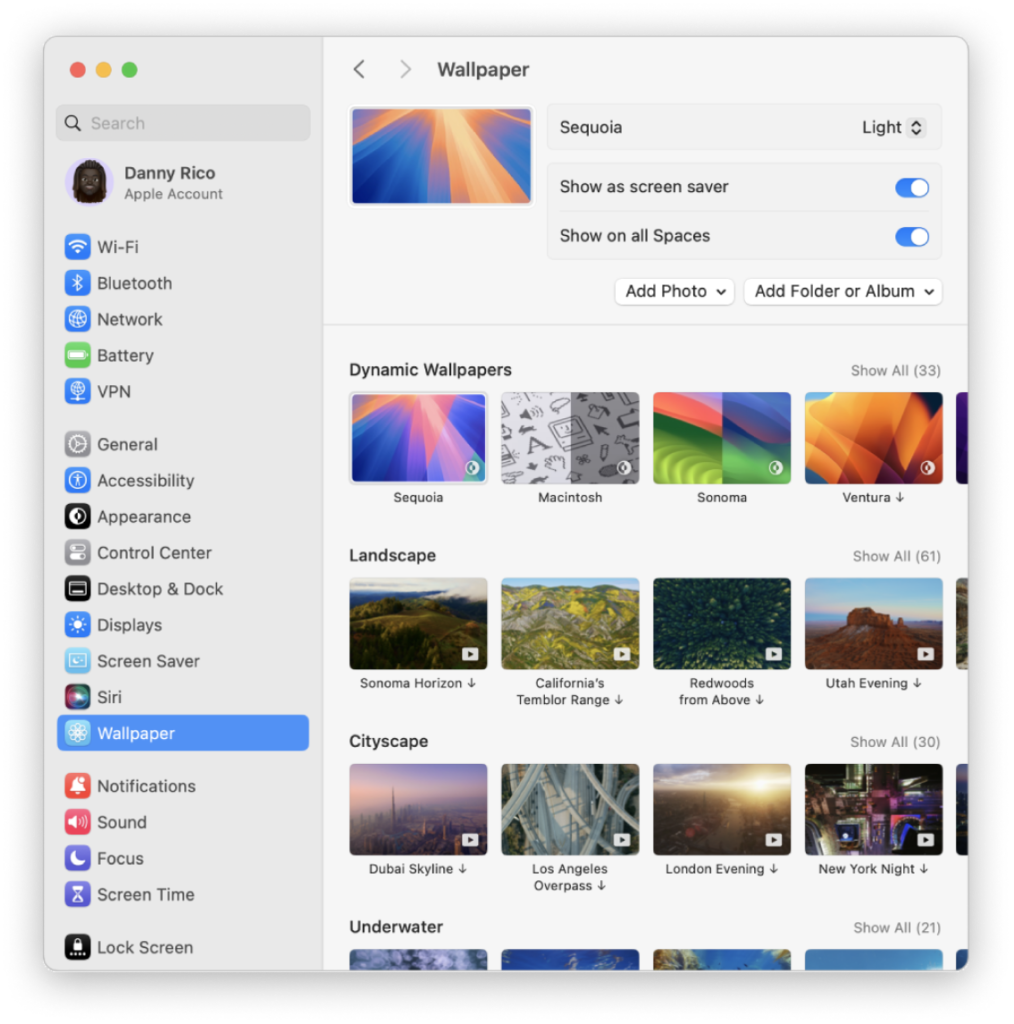
Customizing your Mac’s appearance makes it feel more personal and enhances your productivity. Start by right-clicking the desktop and selecting Change Wallpaper. Apple offers dynamic wallpapers that shift with the time of day, providing a sleek visual experience. For a personal touch, select high-resolution images from your photos or download wallpapers online. Make sure the resolution matches your display to avoid blurry images.
Widgets
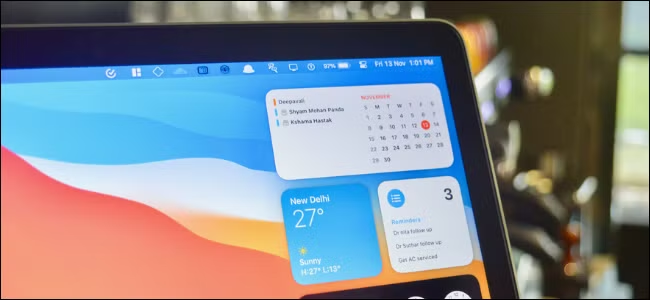
Widgets and notifications help you stay on top of tasks. Swipe left from the right edge of the trackpad or click the date and time in the menu bar to open Notification Center. Click Edit Widgets at the bottom to add weather, calendar, battery, or stock widgets. Drag widgets to reorder or resize them for better organization.
Mission Control
For a cleaner workflow, create multiple desktops with unique wallpapers. Access Mission Control (three-finger swipe up or press F3), click the + in the top-right to add desktops, and right-click to assign a different wallpaper. This visually separates workspaces, keeping your desktop organized.
Hot Corners
To speed up navigation, enable Hot Corners under System Settings > Desktop & Dock > Hot Corners. Assign actions like showing the desktop, launching Mission Control, or opening Notification Center by moving the cursor to a corner. This quick access can save time, especially for frequent multitaskers.
Customizing these elements not only improves aesthetics but streamlines your workflow, making essential information easily accessible.
Final Thoughts
Your new Mac is not just a device – it’s a powerful tool designed to enhance your productivity, creativity, and overall digital experience. By taking the time to explore its features, customize its settings, and install the right apps, you’ll unlock its full potential and make it work seamlessly for you.
From the intuitive layout of macOS to the robust built-in tools like Spotlight, Mission Control, and Time Machine, your Mac is designed to simplify complex tasks and keep your workflow organized. As you get comfortable with its features, don’t forget to personalize your Mac – whether it’s through custom wallpapers, widgets, or specialized apps that fit your needs.
With the right setup, your Mac will become more than just a machine – it will be a trusted companion that helps you stay productive, creative, and connected. So, dive in, experiment with features, and make your Mac truly yours. The more you explore, the more you’ll realize that this is only the beginning of a smooth, efficient, and enjoyable journey into the world of macOS. Welcome to your new Mac!

